HOW TO INSTALL ANY IOS OPERATING SYSTEM IN YOUR ANDROID DEVICE
Android is almost everywhere.Its cheap and is used in a variety of devices and by many companies, unlike Windows or iOS operating system which is only being used by Microsoft and Apple Inc. respectively. Android Open Source Project (AOSP) provides almost all development details on Android so developers learn and also create lots of themes, tweaks, hacks, and ROMs to change Android’s layout and functionalities but they still are not able to achieve perfection in developing iOS themes.
Here are few hacks for you to get a feel of iOS on your android phones. Needless to say, Try at your own risk and take proper backups before proceeding.
1. Using IOS Launcher Apps
2. Installing Custom Rom
1. Lets see few launchers first:
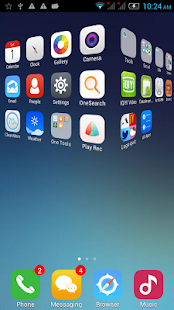
1. One Launcher
One Launcher is most popular iOS Launcher which is available to download for free at Google Play Store. It is easy-to-use launcher without frills and fuss. The interface resembles iOS operating system. Icons wiggles, user have the option to tap X to uninstall or long-press icon to delete/uninstall their apps, uncluttered home screen replacement, smart widgets, effects similar to iOS.

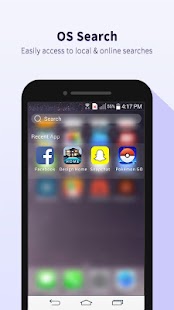
2. OS9 Launcher
OS9 Launcher is developed to provide iOS 9 user experience in Android devices. The sliding effect, icon design, icon size, desktop icon arrangement, screen layout, wallpapers, search, etc. everything is designed to mimic iOS 9 and show the correlation of icons & effects in the same manner. Privacy hider, Quick Touch, OS search and many other tools are available in OS9 Launcher that you will not find in any other launcher.


3. xOS Launcher
This is minimalist iOS launcher app that you need if you only want visual effects and customization features just like iOS and nothing else. The app does not crash your Android or hog precious memory. xOS Launcher is pre-loaded with 10 authentic handset themes Apple iOS, OPPO, Vivo, XIAOMI, Huawei, LG, Samsung, etc. so you have a lot of options to enjoy other brand’s interface while keeping your same beloved Android device.
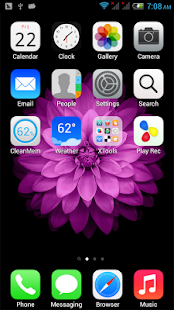


This Launchers would give same look like IOS.
Second approach is to install modified Rom which can give a feel of ios.
2. Using Custom Rom
Firstly you would be required to download the iOS on Android software to your PC or Mac.Once that is done, extract the executable files or the application bundle if you’re on a Mac. Place it in a folder you can find back later. Now follow these steps.
Step 1. Open the iOS on Android installation files on your desktop or laptop.
Step 2. Select the folder to install iOS on Android. Usually program files for Windows and Applications for Mac.
Step 3. Run the installer and open iOS on Android.Step 4. Connect your phone or tablet to your computer using a USB-cable. Even though all compatible cables will work, we recommend using the original cable.Step 5. iOS on Android will recognize your device. Verify if the model of your phone or tablet is displayed in the program. If not, try to update to the newest version of the software. You can find a Check for updates… option under the Settings tab. New phones are released almost every week so be sure to update the software.Step 6. Check the options you want. Though it’s optional, we highly recommend that you make a backup of your phone in the current state. None of your photos, videos or other files will be deleted while installing iOS on Android but it’s better to have a backup. You can also choose between iOS 7 and 8. The newest version of iOS will be installed by default.Step 7. Click Install and wait for the program to install iOS on your Android device.Step 8. Once the installer is done, your device will restart and you are done!
That is how to install iOS on Android devices. You can now use all the functions and features of iOS on your Android phone or tablet.
I hope this helps. :)
Do have a look at other iOS related blogs from side bar.
Feel Free to go through other pages of blogs as well. List given below.
Create your Own Free Blog and start Earning money
Wondering how to start a blog...What to write…
Or putting it off because you’re afraid you’ll mess it up.
Well – today’s the day!
Believe me it’s going to be way easier than you expected. Even if you’re not good with computers.
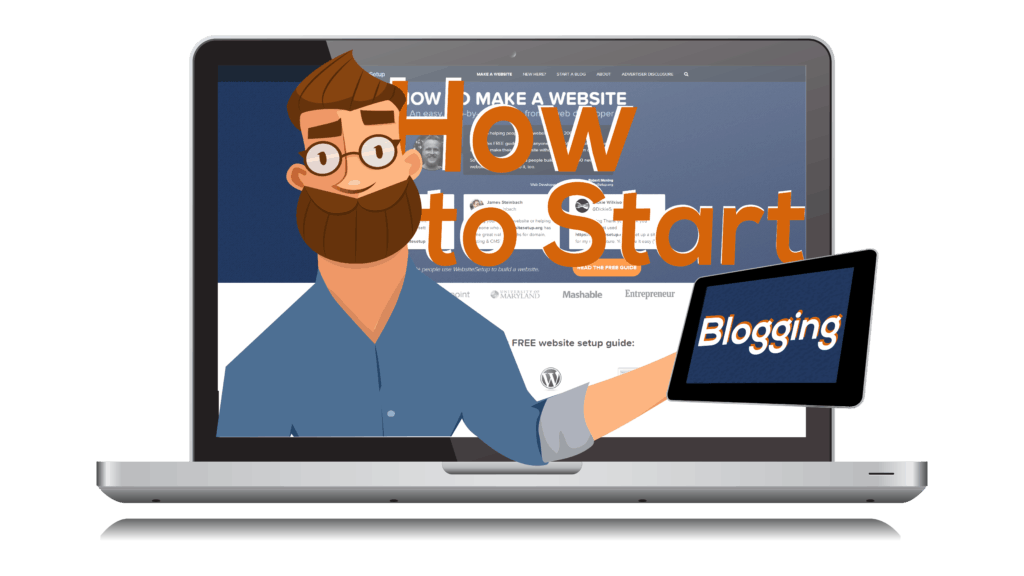
In this beginner’s guide, I’m going to give you foolproof instructions for how to set up a blog
Just Follow basic steps below. Don't worry I'll help with each one.
- Pick your blogging platform.
- Choose a host for your blog.
- Decide on a domain name.
- Set up WordPress (the easy way)
- Start writing!
Grow your audience then go on below link on how to add ads to your blog
Also see:
Why start a blog?
There are many reasons to consider starting a blog. Here are a few popular ones:
- Make money while working from home. I make a full-time income blogging. Many others do the same. Making money as a blogger is hardwork, but it’s low risk, low overhead and low barrier to entry.
- Become a published author. It’s no secret, these days publishers rarely work with authors who don’t have an online presence. The reason is simple: it’s a lot easier to sell books to people who already know you. A blog is one of the easiest and most effective places to start.
- Get more exposure for your existing business or organization. A blog gives anyone, from individuals to large companies, the ability to reach a large number of people at very little cost.
- Just write. If you want to write, share your story, encourage others and build a community, a blog is a great place to do that.
Step 1: Decide what to blog about
- Blog about something you enjoy. If you aren’t excited about your topic, writing about it will be drudgery. Who wants that? Also, why would readers be interested if you aren’t?
- Blog about something with plenty of room for discussion. A blog requires a lot of content to get going and remain interesting. You’ll be at this a long time so make sure you have plenty to talk about.
- Choose a niche in which you can establish yourself as an authority. You probably won’t be the first person to blog about the topic you choose. It’s almost guaranteed someone else has thought of it before you. Don’t fret about this, come up with a unique angle. Do you have a reasonable chance of making your blog better than others talking about the same thing?
Step 2: Choose a blogging platform
If you want to cook, you need a kitchen. If you want to blog, you need a blogging platform.
There are many blogging platforms to choose from. WordPress, Blogger, Squarespace, Wix and Weebly are a few.
All have pros and cons, but WordPress is by far the most popular (source), and for good reason. It’s flexible, functional and has a large community of users who share tools and ideas.
I use and recommend WordPress (but not through WordPress.com).
If you choose WordPress, you have two options: hosted or self-hosted.
- Hosted WordPress blogs, sometimes called WordPress.com blogs, are free but limit your income potential.
- Self-hosted WordPress blogs, sometimes called WordPress.org blogs, cost a little money but give you much more control, and do not limit your income potential.
This guide will teach you how to start a self-hosted WordPress blog, the platform preferred by beginner and veteran bloggers alike.
Note: Even though a self-hosted WordPress blog is sometimes referred to as a “WordPress.org” blog, you are not limited to a .org at the end of your name. You can still use .com, just like I do for AmyLynnAndrews.com.
Alright, let’s get set up!
Step 3: Find a host
Hopefully I’ve convinced you of the merits of WordPress, but there’s one more thing to know. WordPress is simply software. You can download it to your personal computer, but then your blog will only be accessible to you. In other words, WordPress by itself, won’t make your blog live on the internet.
In order for your blog to be online, and accessible to anyone, you need server space. You get server space from a hosting company or “host.”
Step 4 – Designing your WordPress blog
Now, the fun bit.
Let’s make your blog look exactly how you want it to. To choose a new theme, you can either head to Appearance > Themes and install a free WordPress theme or you can head to a premium theme website like ThemeForest.net and buy a theme for around $40.
I usually choose something that looks professional and pretty easy to customise. WordPress also has this awesome feature that allows you to change themes with just a few clicks. So if you start getting tired of your current blog template, you can just switch to another one without losing any precious content or images.

Remember, your blog’s design should reflect both you and your personality, but also what the blog is about. There’s no point having a football-orientated theme if your blog is about tennis, understand?
On top of that, it should be easy to navigate if you want people to stick around. If it’s tricky and difficult to move around it, people won’t stay. Design is a subjective art; meaning everyone likes different things.
You Are only left with last step now !!!
Start Writing... Be as creative as possible...
Good Luck..!!! :)
Grow your audience then go on below link on how to add ads to your blog
Also see:
How to merge Internal and external memory storage in android(Lollipop and kitkat)
If you have Marshmallow then go to How to turn external SD card into internal storage in android phone (Marshmallow)
This Tutorial is to merge Internal and external memory storage in Lollipop and kitkat
- Firstly download the Mini Partition Wizard tool and install it on your PC. Make sure that PC is not Mac or Linux-based, the software only works with on Windows-based PC.
- Save all important data from SD card to safe place. Now connect your SD card using card reader to your PC.
- Now launch the Mini Partition Wizard tool, and follows the below pictures:
- First locate your SD card, just like I did below:

- Now click on “Move/Resize” option listed on top of screen.

- Now set the amount of Internal Memory you want, from my 2 GB memory card I selected 1 GB as my External memory and reset of it as Internal Memory(831 MB). 831 MB is good enough to install lots of apps and some good games. Then press ok, after it you will see two partition, one is of 1 GB and another is 831 MB.

- Now right click on “empty” or “Unallocated” space and then click on “Create”, you will receive a windows warning, just ignore it and select “OK”. This Unallocated memory will be treated as Internal Memory for your phone. Then you’ll reach to below screen:

- Under Create As: set it to primary and under file system choose the Fat32 and then press ok just below:

- After it, click on Apply button placed on top left site of program, then you’ll encounter a “Apply changes” windows, just press “Yes” to proceed.

- After it, a prorgess screen will appears just like below and it takes few minutes to complete the work.

- When it completes, you will get a two partitions of your SD card and you are ready to go further.

- Now remove memory card from PC and put it to your phone.
- Run the Link2SD app and you’ll be asked to “Select the file system of your SD card’s second partition”, select the Fat32/Fat16 option and then tap on ok.

- After it, you may be asked for restart, then just restart the device and again run the Link2SD apps. Now underLink2SD, go to settings.

- Under Settings check the box that says “Auto Link” and all done.


How to turn external SD card into internal storage in android phone (Marshmallow)
How to turn external SD card into internal storage
NOTE: Please be sure you start with a blank SD card. It needs to be blank because when the card is converted to "Internal" storage, it will be formatted (wiped) and encoded (making the cards data only readable by that device).
1. Go to device “Settings”, then select “Storage”.
2. Select your "SD Card", then tap the “three-dot menu“ (top-right), now select “Settings” from in there.
3. Now select “Format as internal”, and then “Erase & Format”.
4. Your SD Card will now be formatted as internal storage.
5. Reboot your phone.
Steps to merge memory storage in Lolliop and Kitkat are describe in previous post
This is for Marshmallow and latter versions.
NOTE: Please be sure you start with a blank SD card. It needs to be blank because when the card is converted to "Internal" storage, it will be formatted (wiped) and encoded (making the cards data only readable by that device).
1. Go to device “Settings”, then select “Storage”.
2. Select your "SD Card", then tap the “three-dot menu“ (top-right), now select “Settings” from in there.
3. Now select “Format as internal”, and then “Erase & Format”.
4. Your SD Card will now be formatted as internal storage.
5. Reboot your phone.
Steps to merge memory storage in Lolliop and Kitkat are describe in previous post
How to merge Internal and external memory storage in android (Lollipop and kitkat)
How to submit sitemaps to Google, Bing, Yahoo, and Ask.com?

After successfully creating a sitemap for a website, the sitemap must be submitted to main search engines manually. This article will provide users with information and steps one should take to submit the sitemap to search engine sites. Submitting to Google, Bing, and Yahoo separately is worth it and does not take much time.
Submitting sitemaps to Google.
The first step is to verify the site. Google will not accept any sitemap without approving the site it is designated for initially.
- Sign in to Google Webmaster Tools just like you log in into other Google features.
- Press “Add a Site” and provide the URL to Google site in the pop-up box. Then press continue.
- On the page that opens afterwards, press the radio button right after “Add Meta Tag.”
- Copy the Meta tag from the instructions box. We’ll use this later.
- Open a new tab in the browser and open the site you wish to verify.
- Press “More Actions” and click “Manage the Site” from the list.
- Click the General from the tabs which is located right under Site Setting tab.
- Now the Meta tag copied from the instructions box should be pasted in the place right next to Verification.
- Save the changes.
- Go to Webmaster Tools where the Meta tag was copied from.
- Press Verify.
The second step is to submit the sitemap to the google.
- Go to Webmaster Tools site.
- Select the site of the sitemap.
- Click Site Configuration-> Sitemaps.
- Click Add/Test Sitemap which is located in top right corner.
- In the box that pops up, paste the following code:
/system/feeds/sitemap - Submit the sitemap.
The sitemap is now successfully submitted.
Submitting sitemaps to Yahoo.
- Log in to the Yahoo account.
- Navigate to Yahoo Site Explorer.
- Add your website to the Yahoo by copy-pasting site’s URL and clicking Add My Site afterwards. Make sure to validate that the owner is you. To submit a sitemap, the validation must be done prior to it, otherwise the sitemap will not be posted.
- Press your website URL and click on feed links in right columns.
- Paste your site map URL and let the drop down “Website Feed.” Click Add Feed afterwards.
- Yahoo team will check and validate the sitemap and site as well. It will begin indexing the site as soon as when they determine that the sitemap is efficient and errorless.
*** Update: Yahoo Site Explorer has been replaced by Bing Webmaster Tools
Submitting sitemaps to Bing.
- Login to Windows Live Account.
- Navigate to Bing Master Center.
- Add your website to Bing search engine by filling the URL bar with your sitemap’s URL. Afterwards, press Add Site.
- Bing staff will check and validate the sitemap and the site. They will begin indexing the site whenever they determine that the sitemap is errorless.
Submitting Sitemaps to Ask.com
Currently, Ask.com does not allow one to submit URL as a site for search engine. They do, however, give permission to submit the sitemap of the website. The interface is not as easy to follow as major search engines have, but one can submit the site map of a site by pasting the URL provided below and pasting the domain name on it…
http://submissions.ask.com/ping?sitemap=http://<The Domain Name>/sitemapxml.aspx
Above we provided guide step-by-step on how to submit sitemaps to major search engines. We provided straightforward and efficient path on how to do it.
*** Update: Ask.com no longer allows you to submit sitemaps. Reference your sitemap location from your robots.txt so that Ask.com can index your content.
Top 10 Must Have Best App For Android
List of Top 10 must have android apps on your new Smart phone
Google Now and Google Assistant are powerful Android apps. They're also both pretty much the same thing. Google Now is a voice assistant like Cortana or Siri. Assistant is much like Google Now except it takes things to the next level. Originally, Assistant was meant for only Google Pixel phones and Google Allo. However, after Mobile World Congress 2017, it started rolling out to more devices. You can use these things to voice search, send texts, issue voice commands, and do all sorts of other things. It's worth having. Trust us.
We don't typically recommend streaming services to people. Everyone has their preferences and saying that one is better than another is a matter of opinion at this point. Except for Google Play Music. The app can read both your local files and the music you like online. Additionally, you can upload tens of thousands of songs to the service for free. Every Google Play Music subscriber also gets YouTube Red. That removes all ads on YouTube, gives you background playback, and more features. The two in tandem is a hard bargain to beat for $9.99 per month ($14.99 per month for a family plan of up to six people).

LastPass is one of those must-have Android apps. It's a password manager that lets you save your login credentials in a safe, secure way. On top of that, it can help generate nearly impossible passwords for you to use on your accounts. It's all controlled with a master password. It has cross-platform support so you can use it on computers, mobile devices, tablets, or whatever. There are others, but LastPass always feels like it's one step ahead. Additionally, the premium version is cheap. You can also grab LastPass Authenticator to go along with it for added security.


Initially, we weren’t going to put any launchers on this list. Nova Launcher seems to be extend beyond what normal launchers are. It’s been around for years, it’s been consistently updated, and thus it’s never not been a great option for a launcher replacement. It comes with a host of features, including the ability to backup and restore your home screen set ups, icon theming for all of your Android apps, tons of customization elements for the home screen and app drawer, and more. You can even make it look like the Pixel Launcher if you want to. If you go premium, you can tack on gesture controls, unread count badges for apps, and icon swipe actions. There’s not much else to say. It’s just that good.

Those who enjoy podcasts probably have the easiest decision in regards to which podcast app that should use. The answer to that question is Pocket Casts. This insanely stable and good looking app allows you to download or stream various podcasts for your enjoyment. It features both audio-only and video podcast support so you can catch up on just about anything. There is also a light and dark theme, a sign-in feature so you can sync your podcasts across devices, and a pretty decent recommendations function. It’s the last podcast app you’ll have to download and one of the best Android apps out there.
File browsing is something everyone inevitably has (or wants) to do, so you might as well do it with a capable, fantastic file browser. Solid Explorer is pretty much as good as it gets in the file explorer apps realm. It features Material Design, archiving support, support for the most popular cloud services, and even some more power user stuff like FTP, SFPT, WebDav, and SMB/CIFS support. It looks great, it’s incredibly stable, and it just works well. You can get a 14-day free trial, but ultimately the app costs $1.99 which isn’t a bad price. It’s one of those Android apps everyone should have.


SwiftKey Keyboard is one of the most powerful and customizable third-party keyboards available. It hit the market several years ago with a predictive engine unlike anything any other keyboard had and the app has grown a lot of over the years. It’s a free download and you can purchase themes for it if you want to. Other features include a dedicated number row, SwiftKey Flow which allows for gesture typing, multiple language support, cross-device syncing of your library and much more. It’s about as good as it gets in the keyboard space. It’s true that Microsoft now owns SwiftKey, but so far they have managed not to mess it up.

Tasker is a glorious application if you have the patience to learn how to use the app. What it does is allow users to create custom made commands and then use them in various places. There are many apps out there that have Tasker support and you can even use Tasker to create very complex commands for NFC tags. It’s difficult to truly explain what this app can do because it can do so many things. Between the apps supported, plugins you an add, and the sheer volume of stuff that you can do, there aren't many apps out there as useful as this one.
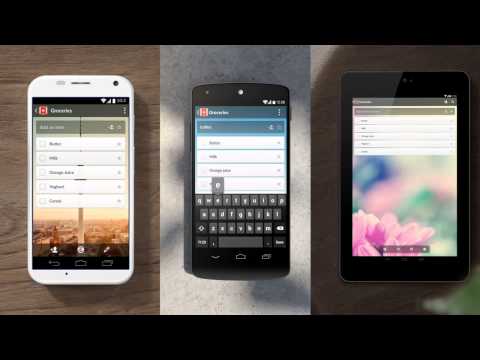
Wunderlist is among the best Android apps for getting things done. It’s a to-do list app that helps you keep track of various tasks that you want or need to do. It’s great for basic stuff like remembering to take out the trash or more complex things like tasks that need done at work. Unlike most, the free version supports the basic functions, like reminders, while the pro version is made for more business-oriented individuals. It’s a versatile app and you can even use it for grocery lists if you get creative enough. It’s a free download which is also nice.

YouTube is probably the most versatile video platform on the planet. You can use it for entertainment, education, news, music, reviews, and a lot more. Virtually everyone knows that you can make playlists, subscribe to channels, and other activities. With YouTube Red ($9.99 per month), you can listen to videos in the background (or with the screen off) along with an ad-free experience. Virtually everyone should have YouTube installed. It just makes sense. We'd by hard pressed to find any Android apps that were more useful than this one.

Last, but certainly not least on our list is Zedge. This is a wallpapers, ringtones, notification tones, and alarm tones app that gives you an unbelievable number of options to customize the most basic parts of your device. On top of having an exhaustive collection of things, Zedge also promotes various items during holiday seasons making it easy to theme your phone up for Christmas, Halloween, and other holidays. It’s not the most perfect app and the advertisements are very irritating. On top of that, their wallpaper selections may not be great for higher resolution displays (you can find better ones). However, if you can get passed that, you’re looking at one of the last really good ringtone Android apps out there.
ExpressVPN
[Price: $8.32 per month (Yearly package)]
If you want to keep your Android device safe on sketchy public Wi-Fi, you’ll need a solid VPN, and ExpressVPN is one of the most trusted, secure brands in the virtual private network industry, and that’s for good reason. It’s super fast and extremely safe, boasting an SSL-secured network with 256-bit encryption and, get this, unlimited bandwidth and speed. ExpressVPN has servers in 78 countries (including Hong Kong, Taiwan, Japan and others) in over 100 locations around the world, so there will always be a location near you to give you the best experience possible. It’s definitely one of the best Android apps! See our ExpressVPN Review.
Exclusive Deal : Get 3 months extra free when you purchase a 12 month plan.
1Weather is arguably the best weather app out there. It features a simple, paginated design that shows you the current weather, forecast for up to 12 weeks, a radar, and other fun stats. Along with that, you’ll get a fairly decent set of lightly customizable widgets and the standard stuff like severe weather notifications and a radar so you can see the storms approaching. Perhaps its best feature is its minimal design which just shows you the weather (and fun facts, if you want). The free version is the completely full version and the $1.99 in-app purchase only removes the advertising. Most will also likely enjoy the range of weather fun facts the app offers as well. It’s one of those must-try Android apps!

Blue Mail is probably the best all-around email app out there. It features a simple interface, compatibility with virtually every email provider, and it just keeps things clean. There are also a set of smart settings that can help you customize your experience. It also comes with Android Wear support, the ability to lock up private emails, widgets, color coding, and a lot more. It's powerful, simple, and best of all it's completely free to download and use. People don't write about it anymore, but it gets updated frequently and rocks a 4.7 out of 5 star rating on Google Play. It's one of those Android apps worth your time.
Google Drive is a cloud storage solution available on Android where all new users get 15GB for free permanently upon signing up. You can, of course, buy more if needed. What makes Google Drive so special are the suite of Android apps that are attached to it. They include Google Docs, Google Sheets, Google Slides, Google Photos, Gmail, Google Calendar, and Google Keep. Between the office apps, the Photos app (which allows unlimited photo and video backup), and Keep for note taking, you have apps for practically anything you need to do in terms of productivity. Some of the features of these apps include live collaboration, deep sharing features, and compatibility with Microsoft Office documents.

Google Maps virtually owns the navigation apps scene and it remains of the best Android apps ever. It gets frequent, almost weekly updates that seem to only add to its incredibly generous list of existing features. Aside from the very basics, Google Maps gives you access to places of interest, traffic data, directions to things like rest stops or gas stations, and they even let you have offline maps now (albiet temporarily). If you add to that the Waze experience, which includes tons of its own features, and you won’t need another navigation app. Ever.
Also check Best Free Games For Android and IOS
Have Fun!!!
Subscribe to:
Comments (Atom)
Subcribe to know more Tricks and Hacks


-
If you have Marshmallow then go to How to turn external SD card into internal storage in android phone (Marshmallow) This Tutorial ...
-
List of Top 10 must have android apps on your new Smart phone Google Now and Google Assistant Price: Free DOWNLOAD ON GOO...
-
 Check out Some of the best ways to make money online without any investment 1. Become a freelancer Freelancing is another pop...

